Update! Second phase of project is complete. New housing set up and new mechanisms found to be implemented in the next phase. Still about two phases away from the final thing with a custom PCB but definitely making progress.
The housing has a slot for the coin cell 3V battery in order to easily show anyone interested. A bar magnet was placed inside which allows me to stick it anywhere on my clothes and without damaging them. It also just looks super cool to slide off and hand to someone, then “magically” snap it back on. The next phase after this will be making a custom PCB to minimize power loss and improve overall performance. Last phase will be putting in some mechanical touches to bring everything together. 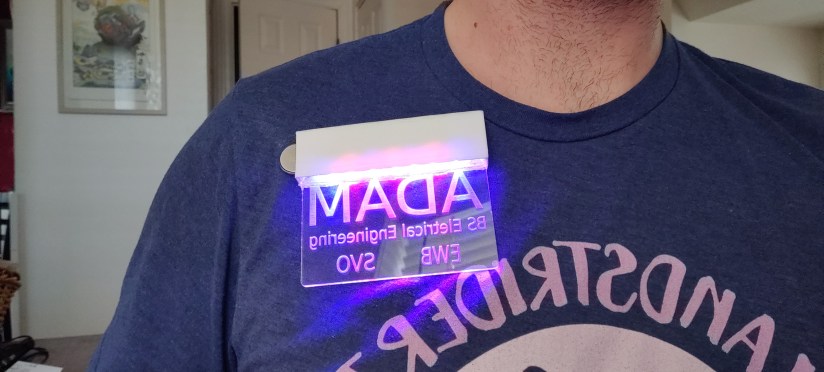
This is a project I’ve wanted to get to for awhile, so excited to share what I got done. This post will be more process oriented until I get some other features and final product done.
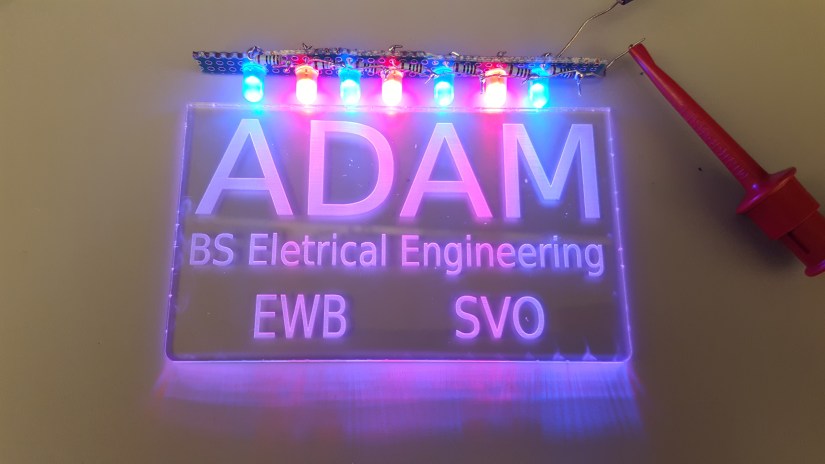
Basically it’s an acrylic plate that’s laser cut with my name, major, and important clubs (Engineers without Borders, Student Veteran Organization). The LED light from the top diffracts out of the etched letters in the acrylic to make the “floating” and glowing effects. Light also refracts out of the sides making a cool highlighting effect as well. Originally I was going to use an EL panel to just back-light some cut out letters from black backing, but I found out about a new makerspace on campus and jumped on it. For the overall design I’m trying to minimize it as much as possible so that when latched on your shirt no other components will be visible.

I used Inkscape (versus paying for Adobe Illustrator) to get the files created and made in the correct format [2 hours]. Laser cut a few test pieces and extras [1 hour]. Cleaned up the dust with a dremel and polished the plate [30 minutes]. Then built the test panel pictured above [3 hours due to fighting myself about how to organize everything to keep as small as profile possible]. I still need to 3D print the enclosure for this basic one, and hopefully leave room for future features. Once I have that it’s just wiring the power source (a 3V coin cell battery), and adding magnets to the back for shirt attachment.
Future features I want to do are hopefully figuring out a way to attach a typical LED strip without having to deal with an adapter box, making a “breathing” light mode, a swath light mode, a light based on/off, and big moon goal is getting power to the board without a wire poking out or through anything.
The board was cut off and has resistor+LED pairs in parallel for stability reasons. In the picture below you can see the general wiring scheme. I typically will wind wire like this to allow efficient testing during building the base outline of the circuit before soldering things together. Once I actually start soldering I’ll keep it on there so I don’t have to make long solder lines, and easier to remove stuff in and out before I have a final product.


